 Jim's photo of last night's moon
Last Tuesday, just before the new moon, I decided I'd like to keep a moon journal... I'm curious to see if there are any patterns I can spot, maybe moods or energy levels or level of dream recall, etc., that are in synch with the moon's cycles.
Couple this desire with my recent refound enthusiasm for altering books and journaling in them and it was obvious that I needed a new journal made from an old book. I was imagining a book of days... or maybe that ought to be nights.
I settled on this book - Origins Reconsidered by Richard Leakey and Roger Lewin:
Its about Richard Leakey (a bit too much about him actually) and his thoughts on the origins of humans.
In order to make this like a book of days I wanted to be able to make notes in it in time with the moon's phases. And this was my first difficulty.
Looking at lunar calendars the moon doesn't fit all that neatly into our more solar-oriented calendar.... for instance the moon's cycle averages 29.5 days (which means having 30 sections). But this varies... so I may have to pay a bit more attention to exact timings... or not mind being out by a day here of there (probably this later!)
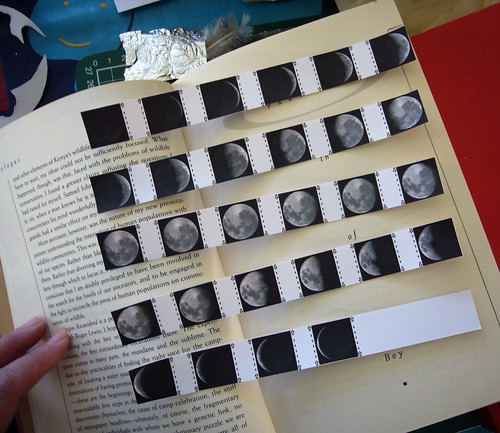
Also when looking for pictures of the phases of the moon, they tend to be given for
28 days:
I found that link via the useful
Phases of the Moon 2009 from Woodlands Junior School which shows great images of the moon for each day of the year.
I may well be going for far too much precision here... It might be sufficient to divide the whole thing into 8 - new, waxing crescent, first quarter, waxing gibbous, full, waning gibbous, third quarter, waning crescent - but I started off with this thought of it being like a book of days and that's how I got here.
So... the next task I set myself was to carve up the book into 30 sections with some sort of index to make it really easy to find the appropriate page for each entry.
I thought a how-to would be worth making (not least, in case I choose to do another!).
How To Make A Step Tab IndexFirst decide how many sections to cut, in this case thirty.
Measure the height of the page and decide how big each tab needs to be.
Consider how many banks to cut, in this case I went for two of fifteen each, if you want bigger tabs then more banks may be needed.
This made each index tab around 1.5 cm (approx 0.5 inch) high.
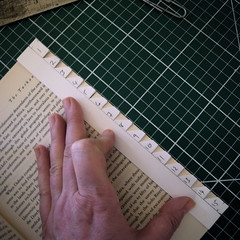
The other measurement to decide on is how deep to cut them. Remember the deeper the cut the narrower the pages. In this case I went for 1 cm (approx 3/8th inch). This turned out to be a really excellent choice as my cutting mat has a 1 cm grid on it.
I started by cutting a piece of card to the height of the book page and cut into it the tabs spacing.
This was to check that the sizes were okay and that my calculation that 15 would fit was correct too. (There really is nothing like mocking something up to check such things!)
I then used this to help me mark up the book.
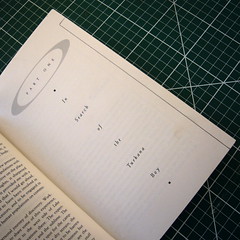
I went through the whole book and penciled in the tabs where I thought they ought to go. This was probably unnecessary but it reassured me that I was right to think I could use the number of pages in each section that I'd calculated. And it was useful to have the pages marked when it came to cutting - useful but not essential.
I decided it was easiest to have the same number of pages in each section (12) and that this ought to be an even number so that each section always started on the left hand page.
(If I complete this as a moon journal I may decide I want more pages in certain sections, and/or fewer sections, for my next journal based on my experience with this one.)
Next the cutting started.
I found it easiest to cut the short first and then the long.
Remember to use a metal ruler and don't try to cut through all six sheets in one go.
Using the ruler as a guide just cut lightly down as many times as needed.
Its very important to put a cutting mat (or equivalent) under the last page of the section for the tab you are cutting.
Having cut the first tab I thought it looked a bit too square and likely to get dogeared. So I looked for a template for a curve.
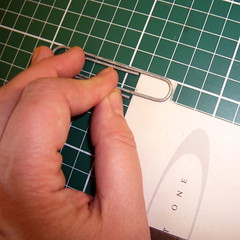
This big paper clip turned out to be perfect.
Here is the first tab with the curve cut.
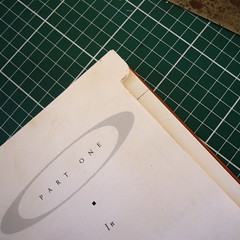
Because I had penciled in all the tabs, once the mat was removed it was easy to see where the next tab was to go.
Just another twenty-nine to cut!
I also cut the full 1 cm off the pages at the front from the pages before my sections as this made the first bank of tabs easier to see.
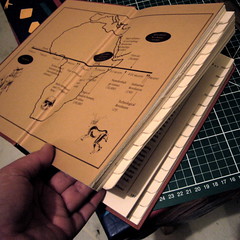
Its quite hard to get a good photo of the finished cuts... maybe it will show up more once I've marked up the tabs.
But that's a job for another day... before then I'm gessoing all the pages.

Last week
Inspire Me Thursday's prompt was, wait for it....
MOON!
Though I think this is a project that'll take rather a lot longer than a week to complete it was clearly the right time to start.


 You can see a reading I did with it and posted to this blog in my first month of blogging.


